
25/09/2024 - 08/01/2025 / Week 1 - Week 14
Joey Lok Wai San / 0350857
Games Development / Bachelor of Design (Hons) in Creative Media
Exercises
TABLE OF CONTENTS
LECTURES
WEEK 1
In our very first class, Mr. Razif briefed us on the module as well as the projects we will be carrying out throughout the semester. We will have to create a 2D platform game using Unity, and we were provided with some examples of our senior's work to give us a clear understanding of what was expected.
Introduction
Game Development Components consists of:
Introduction
Game Development Components consists of:
- Game Design: Design the content and rules such as gameplay, environment, storyline and characters
- Game Art: Creates the visuals
- Game Technology
There are two main elements of a game:
- Story: What problem will the protagonist have to deal with? It follows the story spine/ arc Exposition → Conflict → Climax → Resolution
- Gameplay:
- Challenge: Challenge is the element that will make it difficult for the player to achieve their game objectives
- Strategy: The player should be able to think and develop a way to navigate through challenges
- Chance: Something that will give the player a little bit of advantage to overcome the increasing odds introduced in the game (e.g. bonus life, special weapon, time increase, etc)
- Choice: The player's decision will later affect the story in different ways.
- Luck: An element in a game that can tilt the balance of the game situation (e.g. edge to win)
Fig. 1.1 Lecture Slides - Game Development Components, Week 1 (25/09/2024)
WEEK 2
This week we learned about game ideation and how to generate ideas for our game.
- Brainstorming
- Brainwriting 6-3-5
- 3 people generate 6 ideas in 5 minutes - SCAMPER
- Substitute
- Combine
- Adapt
- Modify
- Put to another use
- Eliminate
- Reverse - 3(I)
- Incorporate/Include
- Improve
- Invert/Inverse

Fig. 1.2 SCAMPER Method, Week 2 (02/10/2024)
After the lecture, we went to these two websites to play a few games and get inspired by these classic games. I managed to play a few games despite the poor Wifi, including Jurassic Park and Testris.
- Website 1 - Online Classic Games
- Website 2 - Classic Games
Fig. 1.3 Lecture Slides - Game Ideation, Week 2 (02/10/2024)
WEEK 3
On the third week of classes, we started using Unity to learn the basics of creating a game, both in 2D and 3D. These are the tutorials live-streamed on YouTube:
See the exercises below for more explanation of what was done.
Fig. 1.4 Lecture Slides - Game Design, Week 3 (09/10/2024)
On the third week of classes, we started using Unity to learn the basics of creating a game, both in 2D and 3D. These are the tutorials live-streamed on YouTube:
See the exercises below for more explanation of what was done.
Fig. 1.4 Lecture Slides - Game Design, Week 3 (09/10/2024)
Layers in Unity
Order in Layer - If you have several elements in the same layer, this is how you determine which should be in front and which should be behind. Higher number = in front
Adding a Sorting Layer
- Go to Sorting Layer > Default > Add Sorting Layer.
- Name the new layer (e.g., "Background" or "Midground").
- Apply the layer to the object
- Example: Layer 1 - Background, Layer 2 - Midground

Fig. 1.5 Layers in Unity, Week 3 (09/10/2024)
Functions in Unity
Start Function
Happens the moment we start out game/ app
Typically used for initializing variables, setting up objects, or loading data.
Update Function
Happens continuously while the game/app is running.
Commonly used for frame-by-frame updates, such as checking inputs or updating the game state.
INSTRUCTIONS
https://drive.google.com/file/d/1Gtkh4m9BvehlC5o1Vlk3Ja0el36iSHBI/preview
EXERCISES
Week 1 | Critical Analysis of an Existing Game

"Reaper Test" by Sam Mun Hoe
The Reaper Test is a 2D platform game developed by Sam Mun Hoe. The game takes place in a mysterious environment where we can control the protagonist, Kuro, through various obstacles and enemies. Kuro passed away from a car accident while trying to save someone and has been chosen to be the next Grim Reaper.

Fig 2.2 "Reaper Test" by Sam Mun Hoe, Week 1 (25/09/2024)
Gameplay
We are tasked to critically review games on the following website: https://thedesignschool.taylors.edu.my/gamezone/. The games we chose and played have to be made using Unity.

Fig 2.1 The Design School 'GAME DEVZONE' Website, Week 1 (25/09/2024)
Of the many variety of games created by students on the website, I played 2 games fully to their completion. These games are:
The Reaper Test is a 2D platform game developed by Sam Mun Hoe. The game takes place in a mysterious environment where we can control the protagonist, Kuro, through various obstacles and enemies. Kuro passed away from a car accident while trying to save someone and has been chosen to be the next Grim Reaper.
Story
Kuro, a normal human being has pass away due to a car accident and was chosen by the gods to be the next grim reaper. In order to become one, he must first pass the test of the gods. The task is to reach the top of the floating tower (Hells Points) without fail. This is a game which require players to utilise their skills and reflexes in helping them get through 3 levels of the game.

In terms of the 5 gameplay elements taught in class, this is how the game rates for each.
- Challenge: The game provides a challenging but not overly hard experience. You get a sense of accomplishment for completing an obstacle but there is a lack of a clear progression system and objectives so the challenge feels less rewarding than it should be. While the game is not very difficult, there is a part of the game that is extremely hard to get through. When the platform moves sideways with spikes on top and bottom, and mines left and right, it took a lot of tries to make it through.Fig. 2.3 Section of the game where the character and my sanity died multiple times, Week 1 (26/09/2024)

- Strategy: While we have to manoeuvre through obstacles and deal with enemies, there is not much strategy involved when playing the game, apart from timing the jumps and the duration/distance of the jumps. The floating parkour platform requires eye-to-hand coordination in order to perfectly land the character onto the platform.
- Chance: Chance does not play a role in this game. It is mostly skill-based and there are no randomized elements like power-ups to give a little bit of advantage to overcome the odds introduced in the game.
- Choice: The game lacks a choice for players. Players could have the choice between killing the enemies by ranged or close-range attack. The game is not a choice-based game and you don't get to make a decision that will later affect the story of the game in different ways.
- Luck: Luck does not play a role in this game. To win the game is mostly based on skill rather than chance or random elements that can tilt the balance of the game.

- Art and Design
- The art style is consistent (characters + platform) and the character designs are simple and cute
- Visual Effects & Animation
- The game consists of good visual effects and smooth animation for the character movement. I like the animation of the swinging effect of the weapon as it adds more depth to the character's movement.
- Controls - Character Movement
- The game uses the W, A, S, D and spacebar controls which makes it easy to control and is familiar to most users. Short tapping or holding the spacebar affects the duration and distance of the jumps. The distance is also not too short or high.

Fig. 2.4 Game Controls, Week 1 (26/09/2024)
- Strategic Gameplay
- The combination of fighting and puzzle-solving skills needed makes the game interesting and makes me want to keep playing
- As you learn the basic skills in the beginning, they can be used to progress further into the game
- There are both melee and long-range moves for attacking and going through obstacles. There are also two varieties of enemies, land and flying, each requiring a different way to attack
- Rewarding Experience
- Long-range movements use energy, meaning you cannot simply use these movements all the time as they are limited. You will have to collect the energy by killing monsters. Killing enemies allows you to gain energy which makes winning against the attack more rewarding. Collecting these energies at certain locations also makes the gameplay feel rewarding as you would want to collect more

Fig. 2.5 Range Attack - Energy Usage, Week 1 (26/09/2024)
Cons (To Be Improved)
- Lack of Clear Story and Objectives
- One of the main drawbacks is that the game has no clear objectives or narrative. We know that Kudo passed away from an accident and is about to be the next grim reaper, and that’s pretty much it. This makes players feel uncertain about the purpose of the game.
- No Clear Level Progress
- The game is missing level progression features. The game description states “The task is to reach the top of the floating tower (Hells Points) without fail. This is a game which requires players to utilise their skills and reflexes in helping them get through 3 levels of the game”. There is no indication of the level of the character. Due to this, it also feels like the game will keep on going and players won’t know when the game ends.

Fig. 2.6 Possible Level Indication - Unsure/ Not Clear, Week 1 (26/09/2024)
- Camera Panning
- The camera panning of the game was delayed compared to most platform games. Maybe they could focus on keeping the character’s tracking element fixed on one point of the Y-axis, such as in the Mario game. With that, the introduction to the upcoming obstacles, especially in the floating part, would be met in time to allow the players to think of the next move and reduce the number of deaths.
- Fighting the Land Enemy
- Most games have a ‘knockback feature’ to the enemies allowing the characters to back up from the fight to avoid getting hurt. As this game does not have this feature, I chose to spam click my mouse to achieve the combo kill from the back of the enemies to not die fast. Furthermore, attacking or not attacking the land enemy leads to me getting attacked either way :/
- Soundtrack & Sound Effect
- First, the game was missing the button UI sound when clicked. The character is missing a few SFX such as when it jumps, runs, attacks (close-range shing shang from the scythe and ranged pew pew magic) and getting hurt and dying sound effects. The enemies are also missing the sound effects when they get hurt or die. The sound effect of items, such as collecting energy from enemies and the ones present at certain locations being collected, is also absent.
- The soundtrack does not loop seamlessly. They could have implemented a fade-in and fade-out. They could offer a mute button for the music. It would be rewarding if there was a victory soundtrack during the end part when an achievement was given.
- Art and Design
- The background feels a little out of place compared to the rest of the game art, though it does match the dark vibe the game is going for
- Other assets in the game, such as the pumpkin, also do not really match the art style, making it look out of place
Conclusion
This was a fun game. Will I play it again? Probably. Did I struggle a lot? Yes, enough to make me have a breakdown over not being able to pass one section of the game. Through this experience, I am able to tell what elements to look out for when creating my own game later in the semester. The fact I have to make something like this in a few weeks scares me. It also makes me appreciate how much effort it takes to create a game like this. It is honestly a well-created game especially for a student wow.
 Fig. 2.7 Completion Certificate for the Reaper Test, Week 1 (27/09/2024)
Week 2 | Create Our Own Game Idea

Week 2 | Create Our Own Game Idea
During our tutorial session this week, we split into groups to create our own game idea. We can use elements from other games in our game idea. Our group consisted of:
Game Idea
To start with no one in our group is avid gamers. We discussed old mobile games we used to play like Candy Crush, Subway Surfers, Cooking Fever, Cooking Mama, and Plants vs Zombies.
We took the concept/gameplay of Cooking Fever but were inspired by the scary zombie aesthetic of Plants vs Zombies. We decided that it would be a cooking game where a zombie is making gourmet food for other zombies using human parts for ingredients. After discussing some more we also decided to incorporate a mini-game based off of Subway Surfers where the zombie (player) would collect the same ingredients before cooking.

Fig. 3.1 SCAMPER Method, Week 2 (02/10/2024)
Canva Link
https://www.canva.com/design/DAGSZiJuerk/uT1CEgkenEUSczeNYMzELQ/view?utm_content=DAGSZiJuerk&utm_campaign=designshare&utm_medium=link&utm_source=editor
- Reema Arif Hamza (0362792)
- Alefiya Hassanally (0361638)
- Chong Hui Yi (0363195)
- Joey Lok Wai San (0350857)
- Low J-Yin (0352888)
- Wong Kai Xin (0353027)
To start with no one in our group is avid gamers. We discussed old mobile games we used to play like Candy Crush, Subway Surfers, Cooking Fever, Cooking Mama, and Plants vs Zombies.
We took the concept/gameplay of Cooking Fever but were inspired by the scary zombie aesthetic of Plants vs Zombies. We decided that it would be a cooking game where a zombie is making gourmet food for other zombies using human parts for ingredients. After discussing some more we also decided to incorporate a mini-game based off of Subway Surfers where the zombie (player) would collect the same ingredients before cooking.

Fig. 3.1 SCAMPER Method, Week 2 (02/10/2024)
Canva Link
https://www.canva.com/design/DAGSZiJuerk/uT1CEgkenEUSczeNYMzELQ/view?utm_content=DAGSZiJuerk&utm_campaign=designshare&utm_medium=link&utm_source=editor
Fig. 3.2 Game Idea - Zombie Chef, Week 2 (02/10/2024)
Week 3 | Unity Game Basics
This week we started to use Unity to create a game. We learnt the basics of creating a game through the exercise done in class. The main things we learned about are:
Rigidbody Component

Fig. 4.1 Adding Box Collider 2D to 'Ground', Week 3 (09/10/2024)

Fig. 4.4 Outcome of Unity Game Basics #1, Week 3 (09/10/2024)

Fig. 4.5 Adding Box Collider 2D to 'Ground', Week 3 (09/10/2024)

Fig. 4.6 Adding Polygon Collider 2D to 'Triangle', Week 3 (09/10/2024)

Fig. 4.7 Adding Rigidbody 2D and Box Collider 2D to 'Rectangle', Week 3 (09/10/2024)

Fig. 4.8 Adding Rigidbody 2D and Box Collider 2D to 'Red Square', Week 3 (09/10/2024)
Fig. 4.9 Outcome of Unity Game Basics #2, Week 3 (09/10/2024)
Rigidbody Component
The Rigidbody 2D component adds physics behaviour to a GameObject, such as movement, gravity, and forces. Without it, the GameObject won't respond to physics.
- Mass: Controls how heavy an object is
- Use Gravity: Controls how much gravity affects the object. Set it to 0 if you don't want gravity.
- Drag: Resistance to movement (higher values = slower movement)
- Angular Drag: Resistance to rotation (higher values = slower spin)
- Body Type
- Dynamic: Fully simulated by physics (e.g., falls under gravity, reacts to collisions).
- Kinematic: Doesn't react to forces but can move manually via scripts.
- Static: Doesn't move or respond to forces but interacts with other colliders.
Collider Component
Collider 2D defines the shape of an object for physics interactions. It determines where and how the object collides with others. Without a Rigidbody 2D, a Collider 2D is static (doesn't move or respond to forces).
- Is Trigger: Detects and activates events when an object enters.
- Obstacle: Blocks movement and objects from passing (e.g. walls)
- Raycasting: An invisible line (ray) to detect objects it intersects with (e.g. check for collisions or distances)
There are different types of Collider 2D such as:
- Box Collider 2D: A rectangle-shaped collider.
- Circle Collider 2D: A circular collider
- Polygon Collider 2D: A flexible shape that fits the outline of your object.
- Capsule Collider 2D: An oval shape, useful for characters.
- Edge Collider 2D: A line collider, often used for platforms or boundaries.
Most Common Elements
- Dynamic Rigidbody 2D with a Box Collider 2D: Ideal for players or moving objects.
- Static Rigidbody 2D with a Box/ Edge Collider 2D: Used for walls, ground, or platforms.
- Triggers: Colliders with Is Trigger enabled for detecting events like pickups or checkpoints.
- Gravity Scale: Adjusted for objects that should float or fall differently.

Fig. 4.1 Adding Box Collider 2D to 'Ground', Week 3 (09/10/2024)
To make the red square bounce and the white squares separate on impact, the Mass of the 'Red Square' is higher/ heavier than the mass of the 'White Square'. When the 'Red Square' falls the white squares are scattered. The lower the mass of the white square, the greater the effect.

Fig. 4.2 Adding Rigidbody 2D and Box Collider 2D to 'White Square', Week 3 (09/10/2024)

Fig. 4.3 Adding Rigidbody 2D and Box Collider 2D to 'Red Square', Week 3 (09/10/2024)

Fig. 4.3 Adding Rigidbody 2D and Box Collider 2D to 'Red Square', Week 3 (09/10/2024)
Fig. 4.4 Outcome of Unity Game Basics #1, Week 3 (09/10/2024)
After the first exercise, we moved on to creating a seesaw which applies the same elements of using Collider and Rigidbody components. This time, we used a Triangle Collider for the triangle shape.

Fig. 4.5 Adding Box Collider 2D to 'Ground', Week 3 (09/10/2024)

Fig. 4.6 Adding Polygon Collider 2D to 'Triangle', Week 3 (09/10/2024)
To make the seesaw function, the Mass of the 'Red Square' is higher/ heavier than the mass of the Rectangle. When the 'Red Square' falls the seesaw lifts up on one way.

Fig. 4.7 Adding Rigidbody 2D and Box Collider 2D to 'Rectangle', Week 3 (09/10/2024)

Fig. 4.8 Adding Rigidbody 2D and Box Collider 2D to 'Red Square', Week 3 (09/10/2024)
Fig. 4.9 Outcome of Unity Game Basics #2, Week 3 (09/10/2024)
Week 3 | Implement Player Control
Next, we did an exercise on implementing player control which uses C# scripts to do some simple programming. We followed the steps shown below in the document. This helped us to learn how to make a camera follow an object and control the direction and movement of the object using WASD/ other keys.
Fig. 5.1 Chapter 1 - Implement Player Control, Week 3 (09/10/2024)
We used a total of 2 scripts for this exercise, this is a brief explanation of what each script does and the actions they make:
1) PlayerController
This script ensures that the camera stays behind and above the player as the player moves.

Fig. 5.2 Player Controller Script, Week 3 (09/10/2024)
2) Camera Follow
Fig. 5.3 Camera Follow Script, Week 3 (09/10/2024)

Fig. 5.4 Workspace of Chapter 1, Week 3 (09/10/2024)
Next, we did an exercise on implementing player control which uses C# scripts to do some simple programming. We followed the steps shown below in the document. This helped us to learn how to make a camera follow an object and control the direction and movement of the object using WASD/ other keys.
Fig. 5.1 Chapter 1 - Implement Player Control, Week 3 (09/10/2024)
We used a total of 2 scripts for this exercise, this is a brief explanation of what each script does and the actions they make:
1) PlayerController
This script ensures that the camera stays behind and above the player as the player moves.

Fig. 5.2 Player Controller Script, Week 3 (09/10/2024)
- public GameObject player;
- This is a reference to the player object. You'll assign the player object in Unity so the camera knows what to follow.
- public Vector3 offset = new Vector3(0, 5, -7);
- This sets the camera's position relative to the player. In this case, the camera is 5 units above and 7 units behind the player.
- void LateUpdate()
- This method is called after all Update methods have been executed. It's often used for camera adjustments to ensure smooth movement.
- transform.position = player.transform.position + offset
- Moves the camera to the player's position plus the specified offset, keeping it in the correct position relative to the player
This script allows the player to move forward, backwards, and turn left or right using input controls

Fig. 5.3 Camera Follow Script, Week 3 (09/10/2024)
- public float speed = 20.0f;
- Sets how fast the player moves forward.
- public float turnSpeed;
- Determines how quickly the player can turn left or right.
- public float horizontalInput;
- Stores the player's left or right movement input (e.g., pressing the arrow keys)
- public float verticalInput;
- Stores the player's forward or backward movement input.
- void Update()
- This method is called every frame and handles the player's movement:
- horizontalInput = Input.GetAxis("Horizontal");
- Captures left/right input from the keyboard or controller.
- verticalInput = Input.GetAxis("Vertical");
- Captures forward/backward input from the keyboard or controller.
- transform.Translate(Vector3.forward * Time.deltaTime * speed * verticalInput);
- Moves the player forward or backwards based on the vertical input and speed.
- transform.Rotate(Vector3.up, Time.deltaTime * turnSpeed * horizontalInput);
- Rotates the player left or right based on the horizontal input and turn speed.
Unity Workspace
This is the workspace of Chapter 1, as followed in the instructions. The Game view is placed side by side so we can see how the object plays in the Game view.
This is the workspace of Chapter 1, as followed in the instructions. The Game view is placed side by side so we can see how the object plays in the Game view.

Fig. 5.4 Workspace of Chapter 1, Week 3 (09/10/2024)
The Mass of the Crates and Vehicle are different in the Rigidbody. The mass of the vehicle is heavier so that when it hits the crate, the crate will go flying.


Fig. 5.5 Rigidbody of Crates (Left) and Vehicle (Right), Week 3 (09/10/2024)
Fig. 9.1 Outcome of 2D Platform Game with Sprites, Week 10 (27/11/2024)
Fig. 9.2 Outcome of 2D Platform Game with HP Bar, Week 11 (04/12/2024)


Fig. 5.5 Rigidbody of Crates (Left) and Vehicle (Right), Week 3 (09/10/2024)
.gif)
Week 4 | Implement Basic Gameplay
This week we learned how to use food to throw at animals, and how to make the animals continuously spawn. This was pretty challenging to do because even with following the tutorial, the animals would not spawn or only one animal got hit, etc.
Fig. 6.1 Chapter 2 - Implement Basic Gameplay, Week 4 (16/10/2024)

Fig. 6.7 Player Settings, Week 4 (16/10/2024)

Fig. 6.8 Animal Settings, Week 4 (16/10/2024)
Fig. 6.9 Outcome of Chapter 2 - Implement Basic Gameplay, Week 4 (16/10/2024)
Fig. 6.1 Chapter 2 - Implement Basic Gameplay, Week 4 (16/10/2024)
We used a total of 5 scripts for this exercise, this is a brief explanation of what each script does and the actions they make:
1) PlayerController
Controls the player's movement left and right on the screen. It also allows the player to throw food when a key/ button is pressed

Fig. 6.2 Player Controller Script, Week 4 (16/10/2024)
2) MoveForward
Makes the food move forward in a straight line when thrown
Fig. 6.3 Move Forward Script, Week 4 (16/10/2024)
3) DestroyOutOfBounds
Removes food or animals when they go off-screen

Fig. 6.4 Destroy Out Of Bounds Script, Week 4 (16/10/2024)
 Fig. 6.5 Spawn Manager Script, Week 4 (16/10/2024)5) Detect Collisions
Check if the food collides with an animal. If a collision is detected, both the food and the animal disappear (destroyed)

Fig. 6.6 Detect Collisions Script, Week 4 (16/10/2024)
1) PlayerController
Controls the player's movement left and right on the screen. It also allows the player to throw food when a key/ button is pressed
- Input.GetAxis(): Reads player input for smooth movement.
- Instantiate(): Creates a new projectile object at runtime.
- Boundary Control: Player can't leave the playable area by resetting their position.

Fig. 6.2 Player Controller Script, Week 4 (16/10/2024)
- Handles Horizontal Movement
- The player can move left or right using input from the keyboard (Input.GetAxis("Horizontal")).
- Movement is limited to a defined range (xRange) to prevent going off-screen.
- Allows Shooting
- Pressing the spacebar (KeyCode.Space) spawns a projectile at the player's position using the Instantiate method.
Makes the food move forward in a straight line when thrown
- Vector3.forward: Represents forward movement in Unity (along the z-axis).
- Time.deltaTime: Ensures movement is frame rate-independent, making the game smoother.
- Public Variable: The speed can be adjusted in Unity's Inspector.

Fig. 6.3 Move Forward Script, Week 4 (16/10/2024)
- Moves the Object
- The Update method continuously moves the object forward along the z-axis using transform.Translate.
- Controls Speed
- The speed variable determines how fast the object moves forward. It's scaled by Time.deltaTime to make movement consistent regardless of frame rate.
Removes food or animals when they go off-screen
- Boundaries: topBounds and lowerBounds define the playable area.
- Destroy(): Removes the object from the scene to save resources or trigger game logic.
- Debug.Log(): Display messages during development (e.g., "Game Over!").

Fig. 6.4 Destroy Out Of Bounds Script, Week 4 (16/10/2024)
- Detects Out-of-Bounds Objects
- Checks if the object this script is attached to has moved beyond the upper or lower boundaries on the z-axis.
- Removes the Object
- If the object is beyond topBounds or lowerBounds, it gets destroyed using Destroy(gameObject).
- Game Over
- If the object crosses the lowerBounds, it logs "Game Over!" to the console in addition to destroying the object.
4) SpawnManager
Spawns animals at random or a certain position at time intervals - InvokeRepeating: Automatically calls SpawnRandomAnimal after startDelay and then every spawnInterval seconds.
- Random.Range: Generates a random value for choosing a position and an animal type.
- Instantiate(): Creates a new instance of the selected animal prefab at the calculated position.
- Input Handling: Adds a manual spawning feature triggered by the "S" key for additional control.
- animalPrefabs: An array to hold the animal prefab GameObjects you want to spawn.
- spawnInterval: Time interval for spawning animals repeatedly.
- startDelay: Delay before the first animal is spawned.
- spawnPosZ: Defines the Z-axis position where animals will spawn.
- spawnRangeX: Defines the horizontal range within which the animals will spawn.

- Spawns Random Animals Automatically
- Uses the InvokeRepeating method to repeatedly call the SpawnRandomAnimal function at regular intervals after an initial delay.
- Manual Spawning
- Checks for the "S" key press using Input.GetKeyDown(KeyCode.S) to manually spawn an animal.
- Places Animals Randomly
- Spawns each animal at a random position along the x-axis within the specified range, while keeping the z-axis fixed.
- Random Position
- The spawnRangeX defines the range of random positions along the x-axis.
- The spawnPosZ defines the fixed position on the z-axis.
- Random Animal Selection
- Chooses a random animal prefab from the animalPrefabs array using Random.Range.
Check if the food collides with an animal. If a collision is detected, both the food and the animal disappear (destroyed)
- OnTriggerEnter: Works only if one or both colliding objects have a trigger collider (in Unity's Inspector).
- Destroy(): Removes the game object from the scene.

Fig. 6.6 Detect Collisions Script, Week 4 (16/10/2024)
Detects Collisions
- The OnTriggerEnter(Collider other) method is triggered when the game object this script is attached to collides with another object that has a trigger collider.
Logs the Collision
- Debug.Log("OnTriggerEnter: " + other.gameObject.name);
- This logs the name of the other game object involved in the collision to the console. It's useful for debugging to see what is colliding.
Destroys Both Objects
- Destroy(gameObject);
- Destroys the game object that this script is attached to.
- Destroy(other.gameObject);
- Destroys the other game object that it collides with.
Unity Workspace
This is the workspace of Chapter 2, as followed in the instructions. The Game view is placed side by side so we can see how the object plays in the Game view. The speed of the player is adjusted in the settings, as well as adding the Food Prefab.
This is the workspace of Chapter 2, as followed in the instructions. The Game view is placed side by side so we can see how the object plays in the Game view. The speed of the player is adjusted in the settings, as well as adding the Food Prefab.

Fig. 6.7 Player Settings, Week 4 (16/10/2024)
The animal Prefabs were added individually, adjusting the 'spawn interval' and 'start delay' values to control the speed of the animals spawning.

Fig. 6.8 Animal Settings, Week 4 (16/10/2024)
Fig. 6.9 Outcome of Chapter 2 - Implement Basic Gameplay, Week 4 (16/10/2024)
Week 5 | Implement Sounds and Effects
This week we made an endless side-scrolling runner game where the player needs to jump over oncoming obstacles to avoid crashing. On top of this, we added music and sound effects, created endless repeating backgrounds, and added particle effects.
Fig. 7.1 Chapter 3 - Implement Sounds and Effects, Week 5 (23/10/2024)
Fig. 7.2 Outcome of Chapter 3 - Implement Sounds and Effects, Week 5 (23/10/2024)
Fig. 8.2 Outcome of 2D Platform Game, Week 9 (20/11/2024)
Fig. 7.1 Chapter 3 - Implement Sounds and Effects, Week 5 (23/10/2024)
Fig. 7.2 Outcome of Chapter 3 - Implement Sounds and Effects, Week 5 (23/10/2024)
Week 7, 8 and 9 | 2D Platform Game
This week we learned to create a basic 2D platformer game. From this week on, we worked on this file to build up the base of the game. A few of the things are shown below:
- Platforms
- Camera Tracking
- Player Controller
- Door Open with Trigger
- Collect Coins
- Key for door appears when certain number of coins are collected
Camera Tracking
Package Manager → Unity Registry → Cinemachine → Install → Add a Virtual Camera in the hierarchy to achieve the camera tracking effect
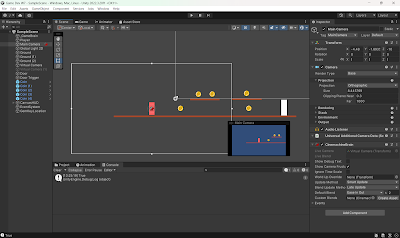
Fig. 8.1 Unity Workspace, Week 9 (20/11/2024)
Package Manager → Unity Registry → Cinemachine → Install → Add a Virtual Camera in the hierarchy to achieve the camera tracking effect

Fig. 8.1 Unity Workspace, Week 9 (20/11/2024)
Fig. 8.2 Outcome of 2D Platform Game, Week 9 (20/11/2024)
Week 10 | Sprites
Building from the same file we used in previous weeks, we added sprites to the main character this week. We learned how to slice a sprite sheet and connect the animations in the Animator panel.
We also added a sprite for the enemy as well as coded it to take damage and die. When the enemy takes damage, it turns red to show visual feedback. This was done using animation as well.
We also added a sprite for the enemy as well as coded it to take damage and die. When the enemy takes damage, it turns red to show visual feedback. This was done using animation as well.
Week 11 | Health Bar
The last thing we did for this game file was to add health bars for both the player and the enemy. The player healthbar was done in the main Canvas, and the enemy health bar is on a Canvas, which is a child of the enemy.
We also implemented a knockback effect. When the character takes damage from the enemy, it flies backward. The knockback effect and health damage is coded to be randomized.
We also implemented a knockback effect. When the character takes damage from the enemy, it flies backward. The knockback effect and health damage is coded to be randomized.
Fig. 9.2 Outcome of 2D Platform Game with HP Bar, Week 11 (04/12/2024)
FEEDBACK
WEEK 1-14
No feedback was given
No feedback was given
REFLECTION
The tutorials were kind of helpful in getting us familiar with creating our own game later on. It provided us with the basics of using Unity to create a 2D game as well as some 3D games. Though it was useful information, I felt like I still did not understand most of what was being taught in class. Throughout the module I don't really understand what I have done, let alone be able to explain what I did. I am proud of the things I managed to create though, it's a very challenging but rewarding experience.
Comments
Post a Comment